As I posted about a couple of weeks ago, my under-sink Reverse Osmosis (RO) filtering system went tits-up. It was a Whirlpool WHER25, that had developed stress cracks in the manifold (where the filters attach). It was an injection molded part, and while it wasn’t terribly expensive to replace, doing a little of internet searching yielded that this system pretty much sucked, failed often, and the shipping costs were more than the cost of the manifold.
I could have just removed the existing unit, and lived with our tap water, but it is Great Oaks, it is pumped out of the ground, and it is horribly hard, and has a strange taste. Not awful, but after using RO water for years, you can tell the difference in your drinking water, your coffee, and your cooking. You don’t have to be a snob to know it. (the first place we had an RO system was when we bought our house in Tucson, AZ. The water there was awful, and it was a necessity). The reality is that living without it would be a non-starter.
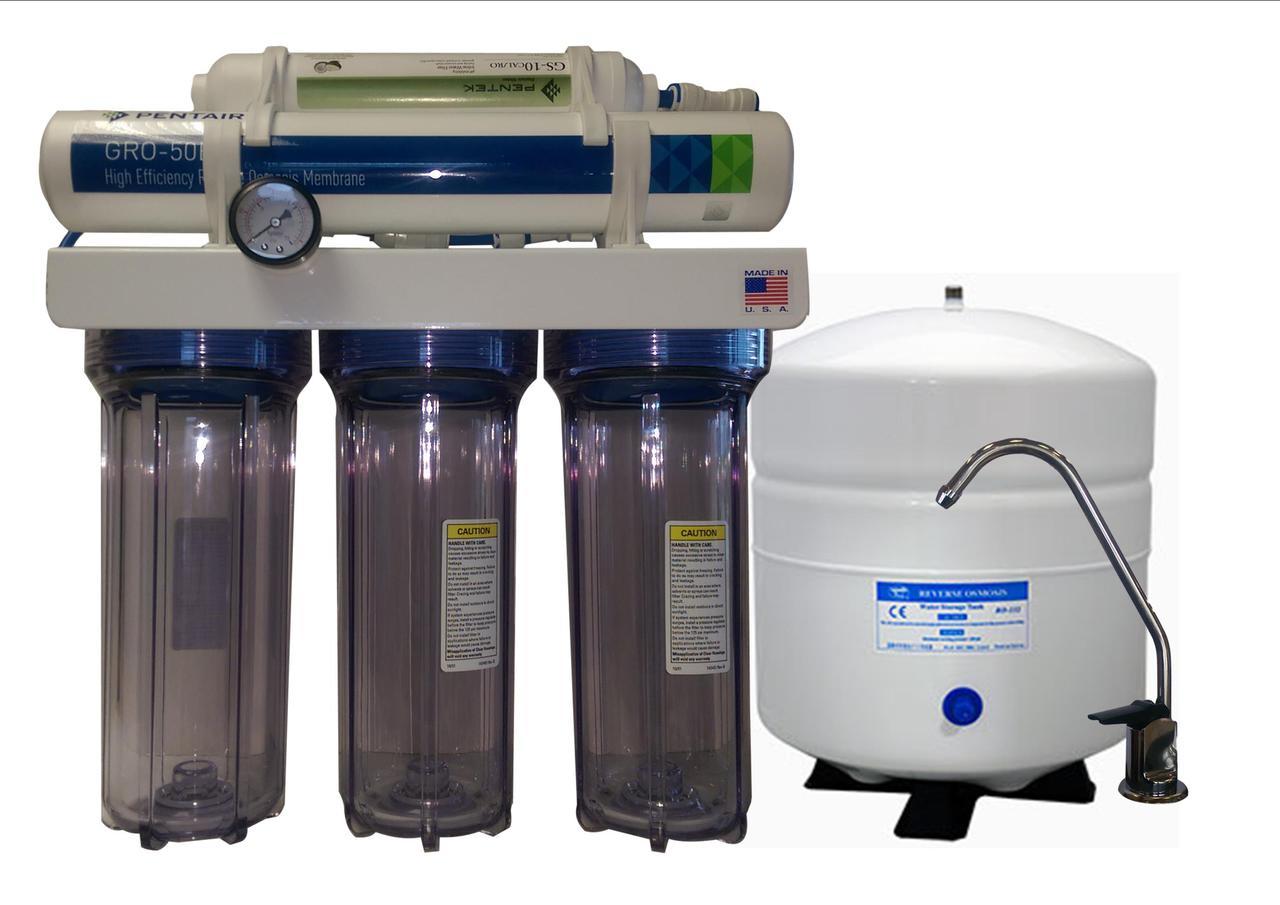
I started a search for a new system, one that was a bit more robust, rated better, and would likely last the rest of my life (yeah, I know that is unrealistic), and found a place called “The Reverse Osmosis Superstore”. They had a brand called Pro-Series that I didn’t see anywhere else. I did call and talk to their excellent service and support team, and I learned that they build the pro series units in house, and could customize it to your needs.
 I originally fired a question to them asking what the difference was between the standard 5 stage RO system, and their “1:1 ratio RO system”, and they explained that instead of the usual 4:1 ratio (that consumes 4 gallons of water to create one gallon of filtered water), the membrane uses 2 gallons of water to make one gallon of filtered water, a savings of 2 gallons per gallon output, something that is important to me in the water parched western US. To me, that was worth a premium.
I called, ordered the base unit with a 4 gallon reservoir tank, upgraded the tap to a brushed nickel that matches my sink, added the Flowlok leak detection system, and the pH balancer for the final output. They sent the order off to their Arizona plant to be built, and less than a week later I received it in the daily UPS delivery.
 One tiny issue, in shipping the unit got manhandled (eff-ing UPS) and one of the quick-connects was damaged (the output from the main filter block). The lock collar on the quick-connect was broken off. $2.17 at Lowes, and I was ready to install.
As I already had an RO system, some of the tough bits were already done, there was the waste-gate output (where the separated brine from the membrane is sent to the drain, the “rejected” effluent). Of course I had to remove the current faucet, and replace it.
The instructions are pretty straightforward, and easy to follow. There is a section up front on sanitization. Important first step (and one that should be repeated when changing the cartridge filters – annually.) The main steps are:
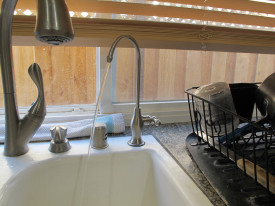
- Install the faucet
- Install the waste outlet
- Plumb it up (connect the reservoir tank, the input, and the output – to the faucet and ultimately to the refrigerator icemaker)
A simple sanitization process (keep the filters out of the water path, a half tsp of bleach and a 15 minute soak) and I was ready to start.
First, the cartridge filters needed to be added. Easy peasy. There is even a handy wrench for that.
 Then add the Flowlok leak tray. It is quite clever. It uses an expanding “plug” that absorbs water and releases a spring loaded plunger that shuts off the water supply to the unit. Wicked cool, and I got the thrill of testing it on the first day (more on that later). It has a slip-fit connector that securely connects it to the middle filter housing on my 5 stage system.
Measuring, drilling and screwing in the hangar screws on the side of my under-sink area was about 5 minutes of effort. The unit is physically larger than the whirlpool one, so it had to go on the other side of the cabinet area. Also, the tank is one gallon larger than the original unit, so it is a bit less room when all is said and done under my sink. Still, all is good.
Hanging the unit, and doing the last bit of plumbing was a snap. They provided plenty of tubing, and while I didn’t install the feed to my icemaker yet, it will be a snap to do that when the time comes.
As I mentioned, there was some slight damage in shipping. While I am certain that they would have sent me a new part, I wasn’t going to wait a week to get that part shipped out, so I drove over to my local Lowes and bought a replacement. $2.17 thankyouverymuch, and I was off to the races.
I also bought a poly tubing cutting tool (totally worth it), and a 1/4“ to 3/8” adaptor (the waste outlet on the old unit was 3/8“, and the tube on the new unit was 1/4”).
Turns out that when I replaced the broken part, while I used teflon plumbing tape to seal the joint, the plastic to plastic threaded part needs a lot more teflon tape to seal. The original job I did leaked a slight amount, and like a charm, the Flowlok shutoff worked a charm. Even if you don’t buy from the Reverse Osmosis Superstore, I recommend highly the Flowlok catch-tray and water shutoff. $36 from a lot of sellers (including Amazon), it will save you one hell of an under-sink mess.
I am still on my second filter/fill/drain/refill cycle, but already the unit is working like a champ.
Check back in a few months for an update, but so far, this is getting 5 stars on my scale.